Importing data from CSV files from your old, slow CRM system is not a glorious task. In fact, it’s an extremely tedious, boring, and worst of all, time-consuming job. But take heart: we’re here to make your job a lot easier.
Click here to download our free ebook on Dynamics 365 and get answers to your questions!
Below are some tips to help you finish your data importing much quicker:
1. Field Mapping:
- The columns heading of your Excel files (CSVs) usually match the attribute names of your previous CRM or ERP systems, which could be different from fields names of your new Dynamics 365. To import this data, the target system needs to know which column of your data should be mapped to which field of the new system.
This field mapping can be done in 2 different ways:
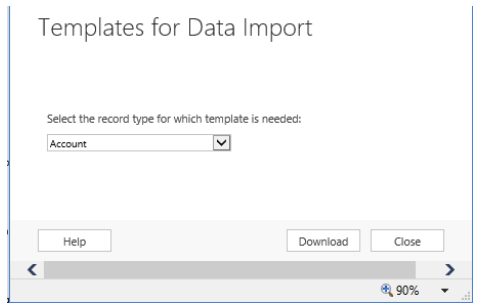
A. Templates for Data Import:
In your new Dynamics 365 go to Settings -> Data Management -> Templates for Data Import. Select the entity you want to import and click Download. Chose the path where you want to save the template.
The Excel file template will contain only the attribute names of the new system, which will look like this:
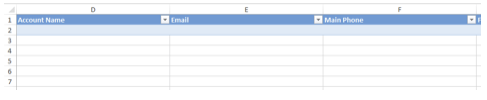
Repeat the same step for all entities you want to import. Copy your corresponding data into these Excel files, or change the column names of your original files if you think that will be easier.
B. Manually map your fields:
Columns that do not have a match in the new system will not be mapped automatically. You need to tell the system which column goes to which field.
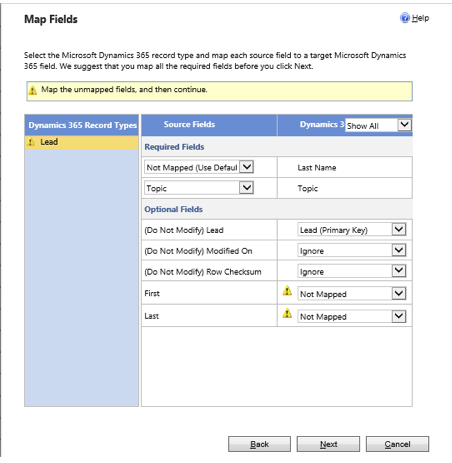
The more unmapped fields you have, the harder your import task will be.
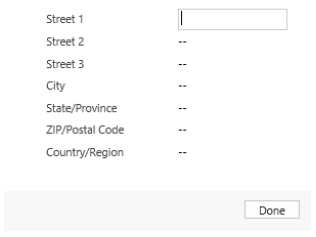
2. How to Properly Arrange the Address Fields?
Address information can be saved in different ways depending on the system where they were saved or where they are going to be saved. For example, “State” and “ZIP/Postal Code” may be saved in one field in your old system, but in Dynamics 365 they need to be saved in separate fields, and look like this:
Thus, your Excel file will look like this:

3. How to Properly Arrange First Name and Last Name Fields?
Full Name in Dynamics 365 is generated from First Name and Last Name. Thus, these needs to be in separate columns in your Excel sheet.
If Full Name and Last Name, or the Address info are in one field and do not match the Dynamics 365 layout, then you need to split that one field into separate fields using the “Text to column” functionality in your Excel file. Below is an example:
Say I have the following layout:
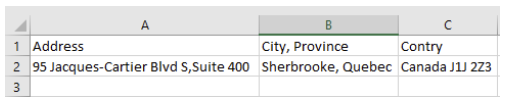
I want to split column A into two columns, and I want to put the first part of the address in Address 1: Street 1 and the Suite section in Address 1: Street 2. Also, I want to split column B into two columns to put City in a column and Province in a separate column. And, I need to split Column C in a column for the country and another column for the ZIP code.
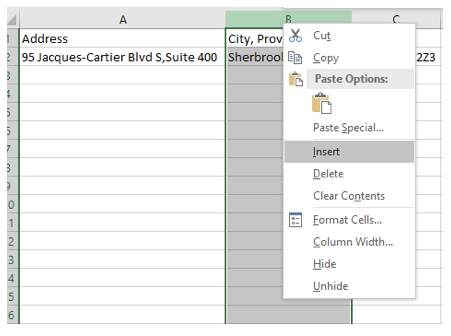
In Excel, Insert in an empty column after A by selecting B then right-clicking and selecting “Insert.”
Select the column you want to split. Let’s start with column A. Go to the Data tab and select “Text to Columns.”-> Select Delimited -> click “Next.”
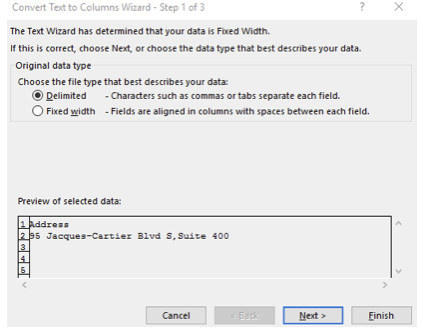
In the next window, we need to select the delimiters of our column. In this case, my delimiter is the comma. Click Finish.

The result in your Excel file will be like this:

Repeat the above steps for all columns you want to split. Pay good attention to your delimiter: it could be a comma, a space, or anything else.
When you are done, copy all the data and paste it into your template. Alternatively, rename the columns in your original files accordingly.
Double-check your files to make sure that the correct data is in the proper columns.
4. Which Data Types to Use?
All or most databases systems including Dynamics 365 are not tolerant towards wrong data types. In other words, make sure you have only numbers in fields that are supposed to be numeric. Examples: Annual Revenue put only numbers, no currency signs: e.g. 300000 instead of $300000.
The system will automatically put your default currency symbol. For Estimated Budget: put 5000 instead of 4000-5000. Use the same principle for No. of employees: put 200 instead of 150-200.
5. Is Date Format Important?
For date fields, your data must respect the date format set up in your Dynamics 365 system.
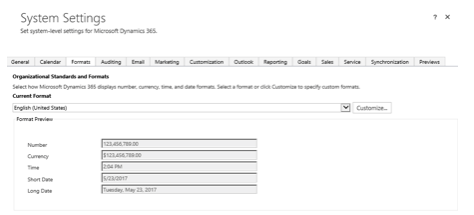
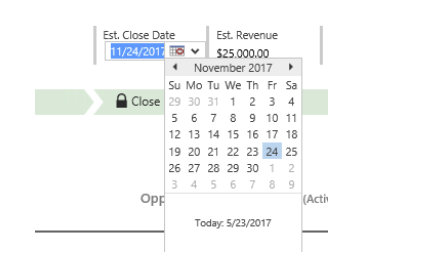
For example, if you use May 23rd, 2017, your file must contain 5/23/2017.
Do not import obsolete data:
Keep your data clean: no unused or unnecessary data. If you have old contacts that you no longer communicate with or if you have closed opportunities, whether won or lost, then it is highly recommended not to add them to your Dynamics 365 system. You may back up those in your own local network, SharePoint site, OneDrive, etc. Import them back at any time if you plan to recommunicate with them.
Click here to sign up to our partner program and start reselling Dynamics 365 in less than 10 minutes
Be the Data Importer Master
Data importing doesn’t have to be an all-day task. Using these tips, you can speed up the process and ensure everything is in its proper place. Furthermore, this will keep your data organized and easily accessible to those who may need it.
Now you can be the unsung hero of your company’s data importing needs.
