Your data is a mess, and you’re having issues trying to organize it. You might have even downloaded third-party software to help you out, which just clutters your computer space and scatters your data. Dynamics 365 can help with its customizable fields to get you organized and running smoothly.
While Dynamics has loads of customizations and configurations that I can’t cover in one blog post, I’m going to focus on the field level customizations and how Dynamics 365 can cover my business process from A-Z without external systems.
Microsoft allows me to create different types of fields depending on my business needs.
Here are the different ones we can create (for simplicity, I’ll provide examples of different fields that can be created in the Lead entity. Please note that these types of field are generic and can be created on any Dynamics 365 entity):
- Single Line of Text: This one is simple and obvious. If you need to create a field with a text value on your form, this is what you need.
e.g. If you want to add an alpha-numeric “Reference Number” on the lead.
- Multiple Lines of Text: Just like the one above but this one serves as a big block of text.
e.g.“Description” field on Lead - Option Set: This field contains a drop-down of different values if you need to restrict the user to choose one of the predefined values you provide.
e.g.“Lead Profiling” field with values like [Cold/Warm/Hot] - Two Options: This field contains [Yes/No] values by default. They can be changed to have custom values, but unlike Option sets, they can only contain two options as the name suggests.
e.g. “Lead contacted by Sales Manager” with [Yes/No] values. - Image: This field can be a bit confusing as we are only allowed to add one image field to any entity. And it’s not added in Form Editor like the rest of the field types. Instead, after creating an image field, you must go to the entity information and set it as the primary image.
e.g. If you have a photo of the main contact, you can add it in the lead. - Whole number: If you’re using Dynamics 365, chances are you’re going to use number fields to keep data about quantities and values. This will represent integers in the form.
e.g. Field “Quantity required” for example to represent the quantity of products the lead seemed to be interested in. - Floating point number: Decimal number with precision 5. This can be used whenever a decimal is needed.
e.g. a field that calculates “Average consumption.” - Decimal number: This is similar to the floating point but with precision 10. This field type is usually used when there’s a very accurate calculation that can’t be represented with a floating point. For better performance, unless super precise values are needed, floating points are better.
- Currency: This is a field represents a money value.
e.g. “Initial Budget” field on the lead form. To have one of these on the form, the out-of-the-box currency field should be visible (USD or EUR) - Date and Time: This can have a date-only value or store date and time.
e.g. “Submission deadline” on the lead (these fields can be useful to set reminder emails or tasks). - Lookup: This represents a linked entity. It acts like a “hyperlink” to the other related entity.
e.g. If you have customers from different countries, you can create a custom entity called “Country” that will contain all the countries you deal with. On the lead form, you can create a lookup field to the country that way you can link each lead to a specific country. - Customer: This field is very similar to a regular lookup, but it points to Accounts and Contacts assuming that customers can either be individual persons or companies.
How to create or edit fields in a glance
You don’t need to be a tech or development expert to add a simple field; Dynamics 365 makes it very easy.
There are mainly two ways to access the form editors: from the form itself or from a CRM solution.
Solutions are usually used by Dynamics Developers to move changes between environments, so let’s focus on the forms for now. Below, I’ll show you how to add a field directly from a form.
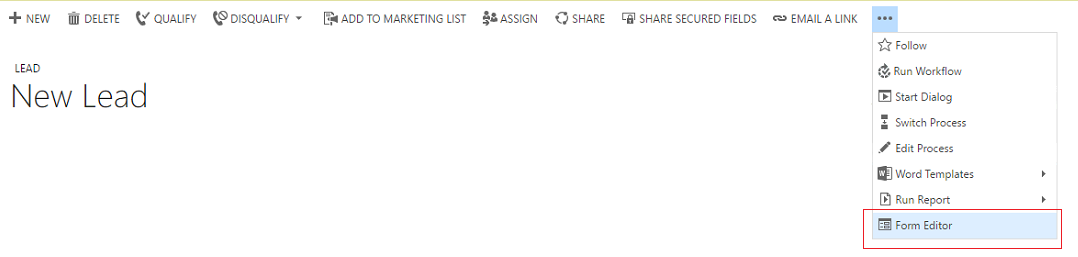
- Go to the form where you want to add a field (for consistency’s sake, let’s stick with a lead form).
- Click the command bar and choose Form Editor.
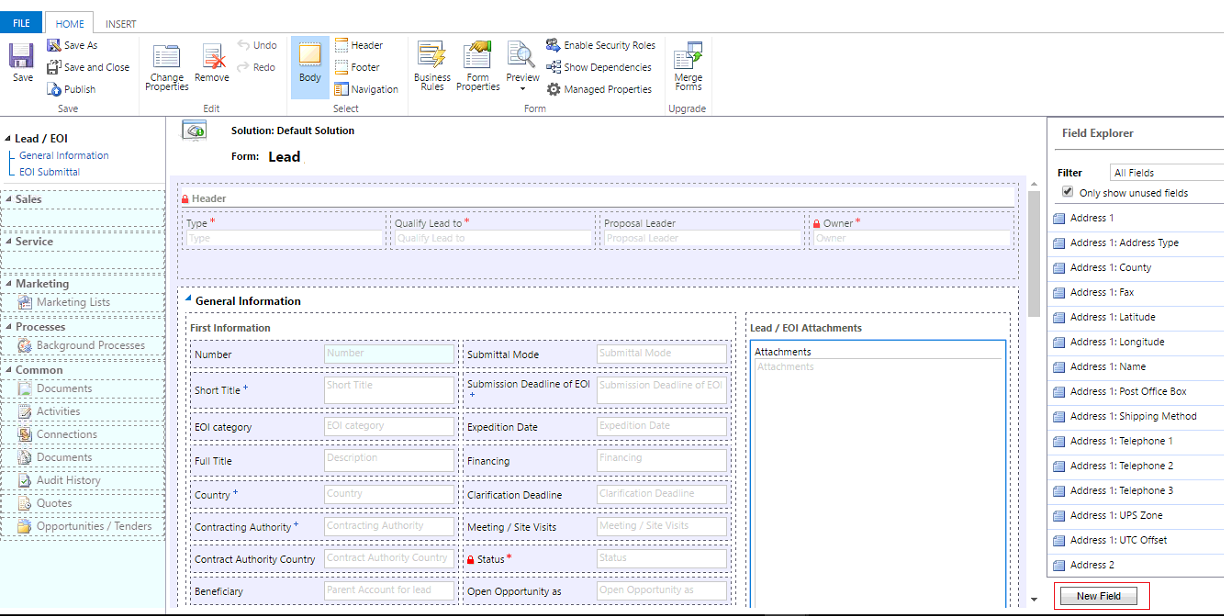
- In the Field Explorer section on the right, click on “New ”
- Here you can choose all the field properties before saving. Please note that some of the properties cannot be changed after the initial save (e.g. Name, Field type, etc.).
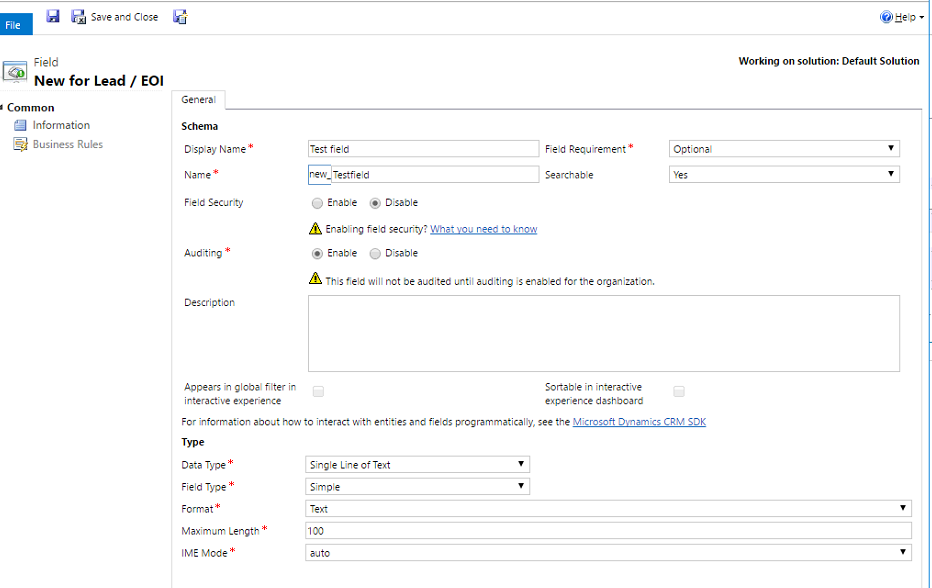
- Click Save and
- You’ll see the field in the “Field Explorer” section of the Form Editor.
- Drag and drop it anywhere on the form.
- Click Save.
- Click Publish (to make changes visible to the user).
- Go back to your form and refresh the page.
- You’ve successfully created a new field!
Organize all your data at one place
By having the ability to create and edit fields at will, you can keep your data all in one spot and organized for easy reference.
Get rid of pointless third-party software that only eats up space and costs you time by having your data in several programs.
Now that you can add fields in Dynamics 365, you can keep your business opportunities on track and on time.
