Struggling to organize tasks in your workplace? Are your teams having communication or collaboration problems? Then it’s time to give Microsoft Planner a try.
This handy Office 365 app is perfect for an agile workflow. It lets your teams create plans, organize their work, assign tasks, collaborate, set deadlines, and upload or share files—all within a single app.
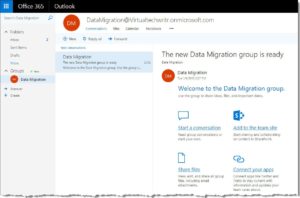
Need to track progress? It’s right there on your dashboard, with regular updates sent through email notifications. Each plan in Planner also automatically creates a new Office 365 group to help you stay organized.
So how do you get started with Microsoft Planner? First, we need to create a plan.
Learn how to sell Office365 the right way with our FREE Sales Guide
How to Create a Plan in Microsoft Planner
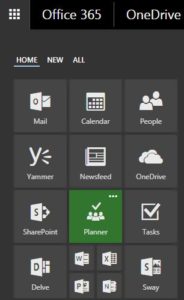
From the Office 365 menu, select the Planner app icon:
The New Plan dialog appears:
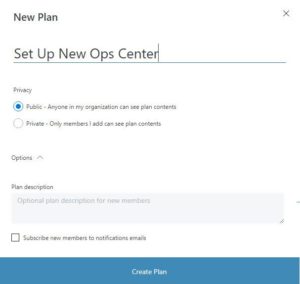
Here, you can:
- Set the plan to be either public or private.
- Enter a description (optional).
- Subscribe new members to notification emails for the plan.
Once you’re done filling out that info, click the Create Plan button.
At the top of the Planner UI, you’ll notice a navigation with three pages: Board, Charts, and Schedule. By default, your main page (Board) will look something like this:
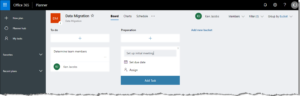
As you can see, the main Planner page is very simple and has a clean layout.
Creating Tasks in Microsoft Planner
Now that you have a plan, you can begin to assign tasks to the team members. Don’t worry—it’s a lot easier than you think. Planner will guide you through all of the steps.
To get started, click the Add Task button.
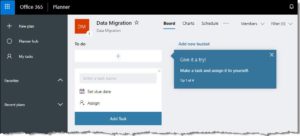
You can:
- Assign the new task to a bucket (more on that in a bit).
- Enter the status of the task.
- Enter a start and due date.
- Enter a description of the task.
- Choose whether to add an item to a checklist.
- Add relevant files as attachments.
- Enter comments about the task.
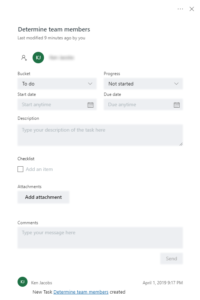
Enter a name for the task, set a due date (if known), and click Assign to assign the task to a team member.
The same section shows the tasks assigned to you. They are grouped according to status, such as Not Started, In Progress, or Completed.
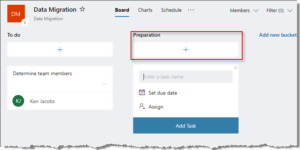
Grouping Tasks into Buckets

During or after the creation of a task, you can place it in a bucket to break up your work into phases, types of work, departments, or whatever makes the most sense for your team.
To get started, click the Add new bucket link. Then, simply give the bucket a name. For this example, we’ll create a bucket named Preparation.
You can then click the plus icon to begin adding additional tasks.
And that’s about it for creating tasks in Planner! It’s that easy.
Up to this point, we’ve been working with the Board tab. Let’s explore some of the others.
View Charts in Microsoft Planner
First, click on the Charts tab at the top.
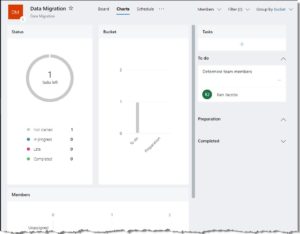
This page gives you a visual overview of your plan and its tasks and buckets. Under the Status group, it shows the status of all tasks in the plan according to the following labels:
- Not Started
- In progress
- Late
- Completed
Then, under the Buckets group, you can see how many tasks (and which ones) have been assigned to all of your buckets. Under the Tasks group, you can explore individual tasks or create new ones as before. And finally, at the very bottom under the Members group, you can see which team members are assigned to which tasks.
View Schedule in Microsoft Planner
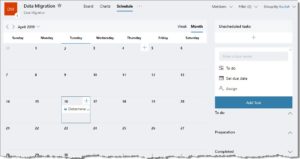
This page lets you quickly see which tasks are due by week or month. It also lets you create a new task as before via the right-hand panel.
Other Microsoft Planner Features
Next to the tabs at the top of the page, click the button with the three orbs. You’ll see a dropdown with available options which we’ll explain below:
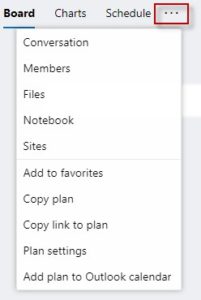
Note: Once you select an option from this menu, the navigation tabs and the options menu will change to reflect actions associated with that particular option you chose.
Once you choose an option, you can easily select another one via the left-hand navigation, as well as search for content across the entire site:
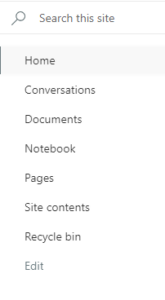
Conversations
You can initiate conversations with team members via Microsoft Outlook email through Planner by selected the Conversations option from the navigation we looked at above.
You can:
- Start a conversation.
- Add content to a team site.
- View, edit, and share files with the team.
- Connect with apps like Twitter and Trello.
Members
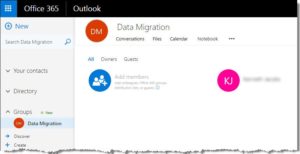
You can view, add, and delete team members, as well as change their status. The members are grouped as All, Owners, or Guests.
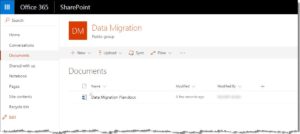
Files
You can create, upload, or delete files related to a particular plan.
From the left-hand navigation, in addition to creating a plan, you can also view existing plans, and view plans that have been marked as favorites.
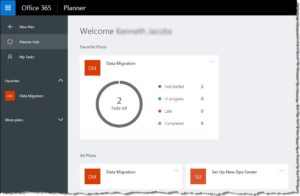
In the example above, the Data Migration plan is listed as a favorite.
Notebook
This option connects your team to the Office 365 OneNote Online app. Here, you can add content such as text, images, or notes.
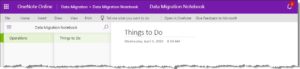
This is a centralized location where you can add news that’s important to the team. It also shows a feed of recent content-related activity.

Favorites
This option allows you to add or remove content from the Favorites list in the left-hand panel.

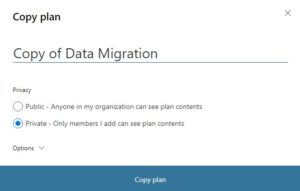
Copy Plan
This is useful when you have similar plans and don’t want to recreate them. It has the same options available as when you create a new plan.
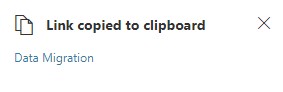
Copy Link to Plan
This option lets you copy a link to the plan that you can share with people who aren’t members of a plan.
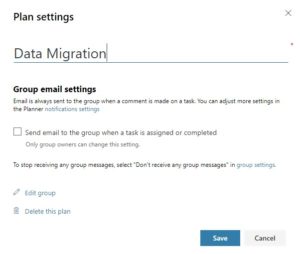
Plan Settings
With this option, you can view or change the settings for each individual plan. You can send a notification to team members when a task has been assigned or completed, or you can opt out of this feature. You can edit the group and even delete the plan from this dialog window.
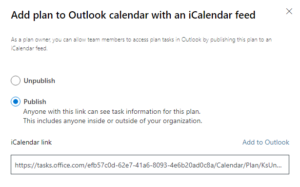
Add plan to Outlook calendar
This option allows you to publish tasks to team members’ Outlook calendars (or to unpublish them). When you’re ready to publish, Planner creates a link that can be shared or sent to Outlook.
Resell Office 365 easily with Sherweb
Organize Your Work with Microsoft Planner
We’ve only peeled back one layer of the functionality of Microsoft Planner. Overall, it’s an extremely powerful app that lets team members stay up to date on their team’s tasks, content, and conversations.