A shared mailbox is accessible by multiple users, all of whom are granted specific access permissions. Every member is able to read and send email messages to and from the shared mailbox itself. Shared mailboxes are widely used. They permit performing a wide range of coordinated activities with a team. Essentially, a shared mailbox acts as a centralized service allowing many people to work in a synchronized manner.
Want to see how a Sherweb partnership sets you up for success right from the start? Unlock the entire journey with our Partner Guide
Among the most common advantages of using shared mailboxes include these abilities:
- Monitor and send email from a centralized account: For example, info@helpdesk.com, info@humanresources.com.
- Handle customer email inquiries: Numerous users within the organization can share the responsibility for monitoring the mailbox and answering queries.
- Share Outlook calendar information: Multiple users can plan and view work shifts and/or holiday time.
In this article, you will learn how to configure a shared mailbox in Outlook and what to do if the shared mailbox is not synchronizing properly.
Add an additional shared mailbox in Outlook
Once your shared mailbox account is ready (created either on Active Directory on-premises or on Azure Active Directory) you can proceed by adding it to your Outlook profile.
You should keep in mind, however, that there are different methods to do this. Depending on the infrastructure Office 365 is relying on, a shared mailbox added using a different method than the one shown below might not work as expected, or might produce error messages.
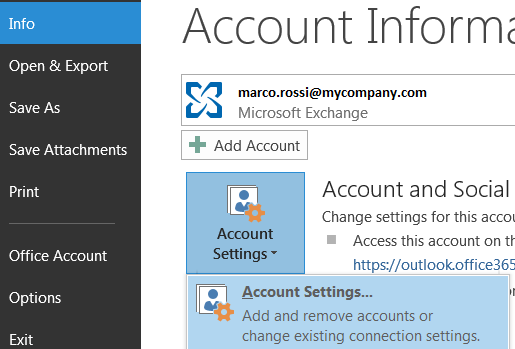
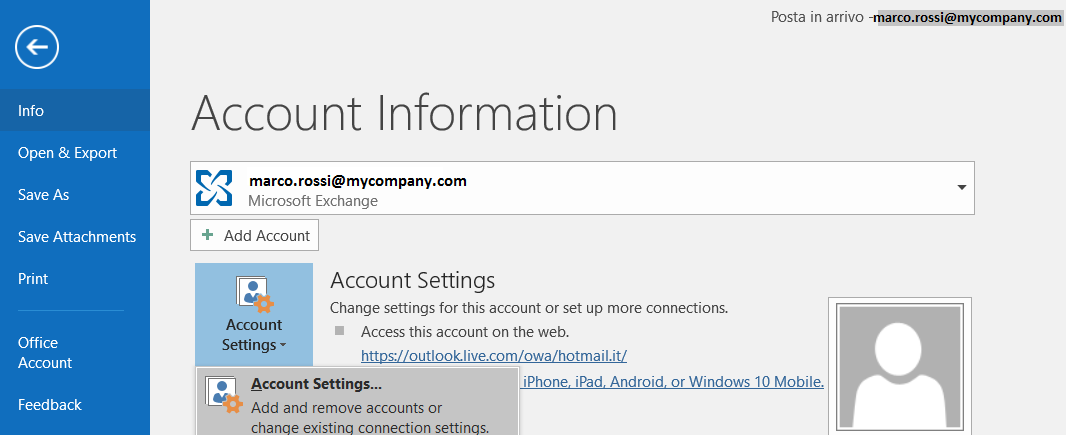
In Outlook, go to File > Account Settings > Account Settings.
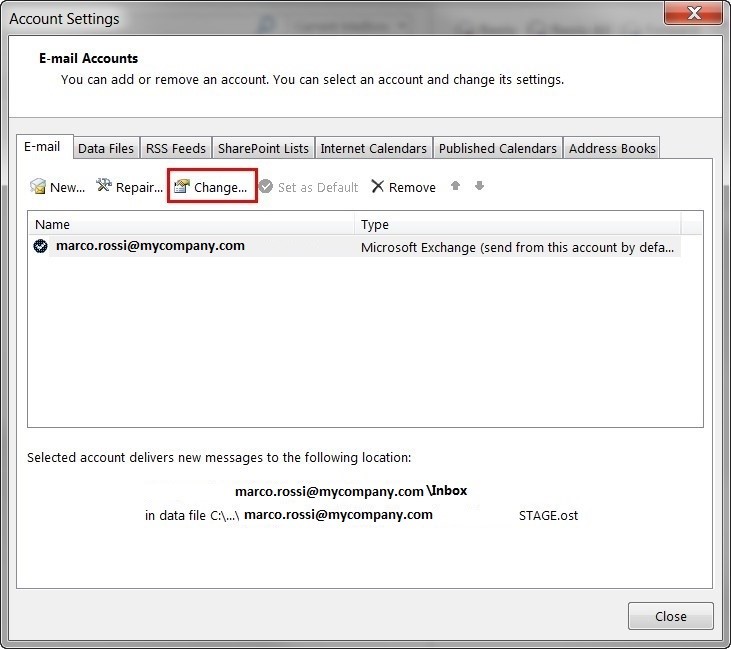
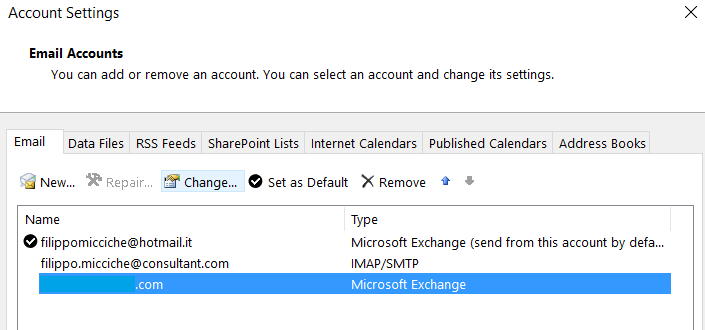
Select your profile and click on Change.
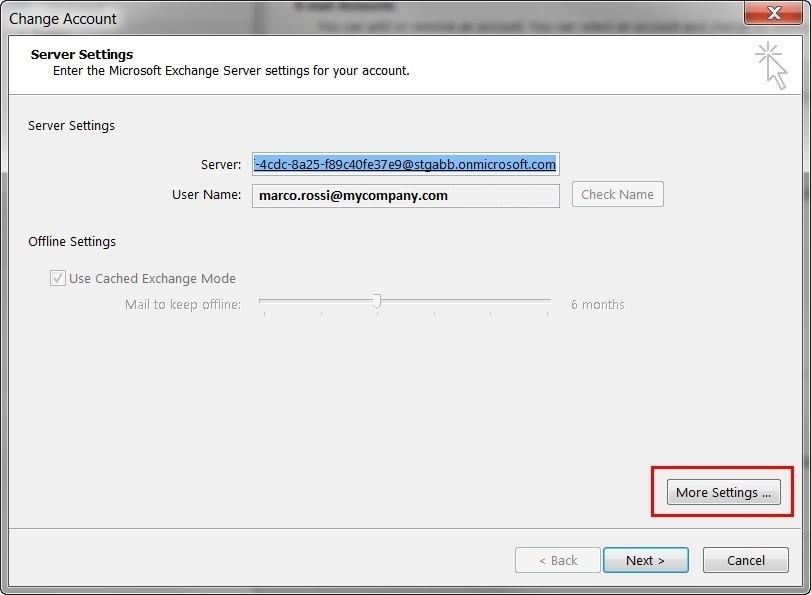
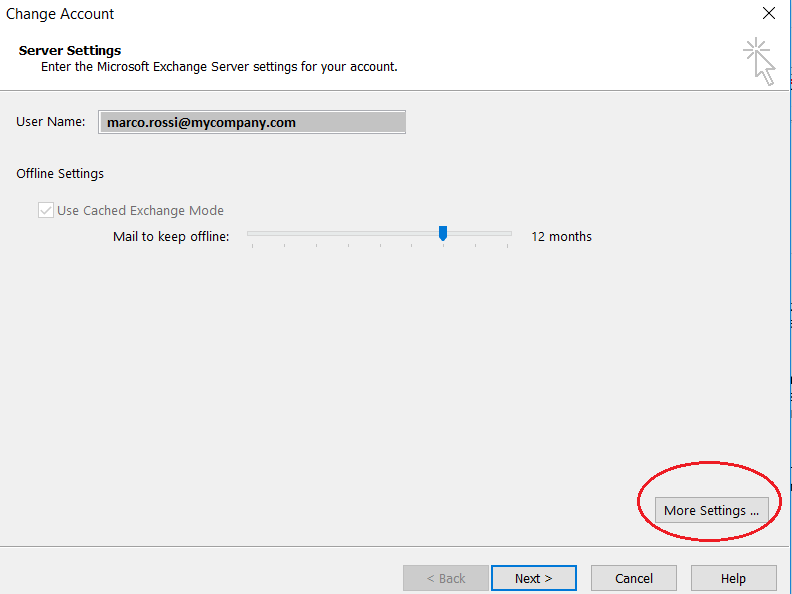
Click on More Settings.
On the Advanced tab, click Add.
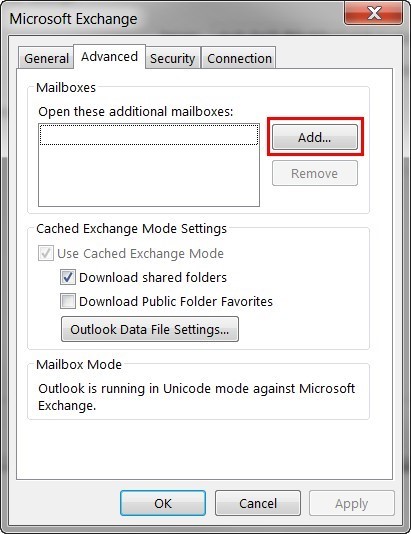
Type the email address or name of the shared mailbox, then click OK.

Once configured, the shared mailbox will be automatically available in the left folder pane in Outlook.
Delegate access to shared mailbox for another user
With the exception of the mailbox owner, anyone else who needs to access the additional mailbox (and configure it on his Outlook profile) must be granted the correct permissions.
There are two main actions the mailbox owner will need to take in order to provide another user with access to the shared mailbox. Please consider, however, that once the process below is completed, permissions might not be available in real time to the user, since permission replication over the whole infrastructure might take a while.
Action 1: Delegate Access
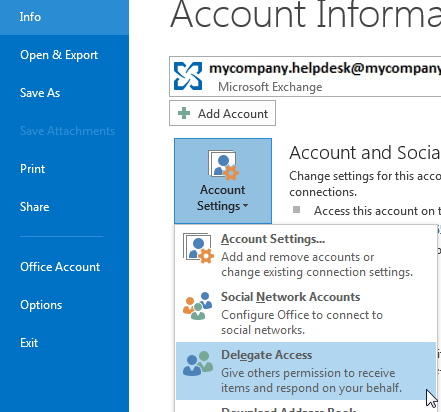
In Outlook, go to File.
Click on Account Settings > Delegate Access.
Click Add.
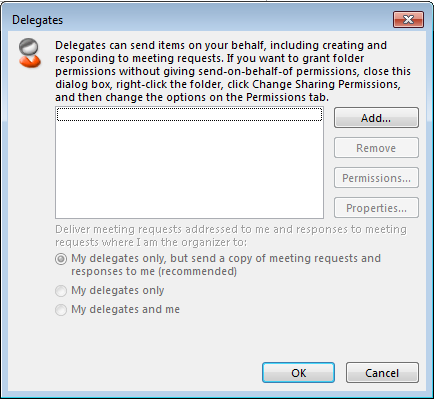
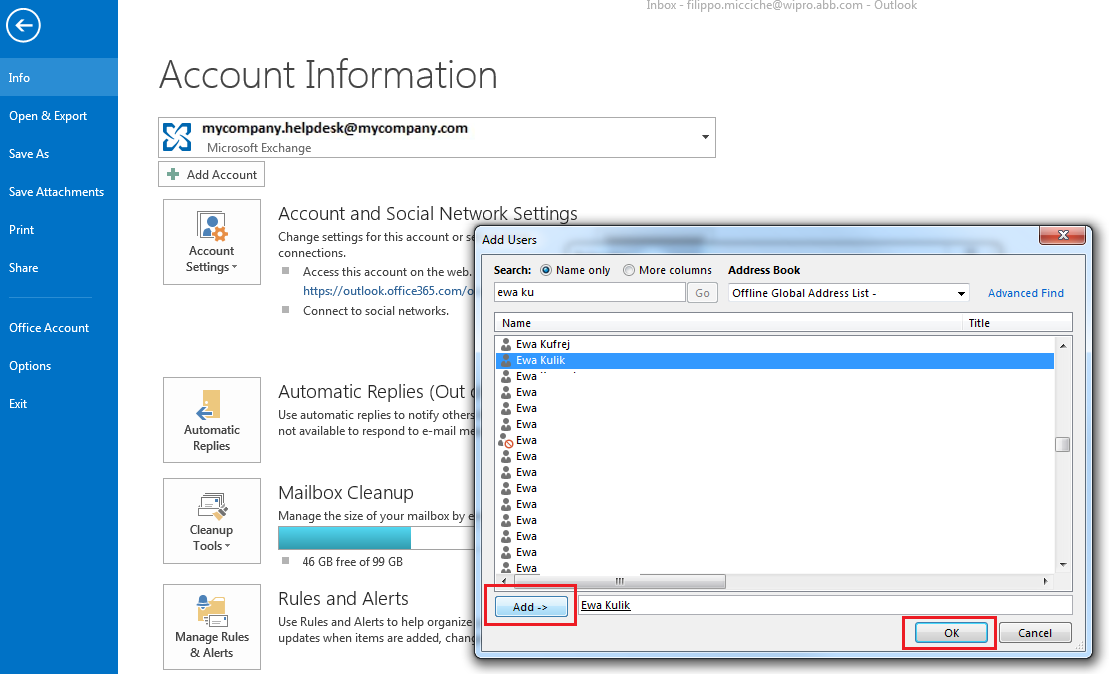
Select the user who will work with the shared mailbox (use Ctrl-click to select multiple names) and click on Add > OK.
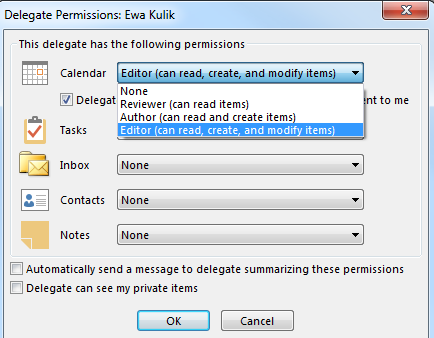
Select the permission level you want to assign for each section: Calendar, Tasks, Inbox, Contacts, Notes.
Select Editor permissions (which will provide full access) and click OK.
Action 2: Set granular permissions over a shared mailbox for the targeted user
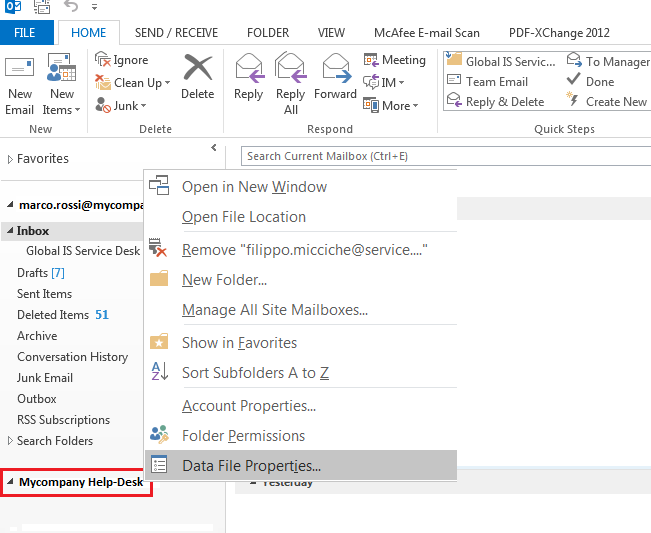
Start Outlook, go to “Mail”, then right-click on the Shared Mailbox.
Click on Data File Properties.

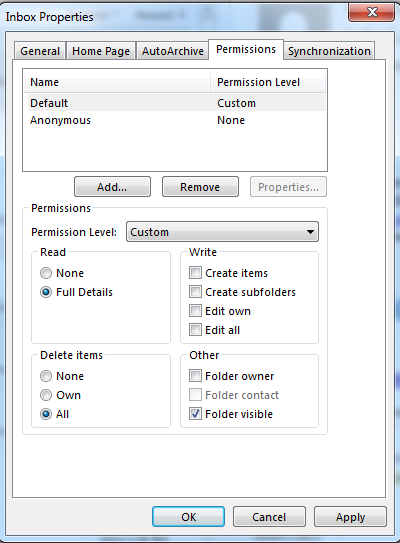
Select the Permissions Tab from the menu.
Under Permission Level, select Full Details > All > Folder Visible, as below.
Click the Add button.
Enter the name or fully-qualified email address of the target user and click on Go.

Select the name from the list, and click Add > OK.
Select Editor. Under Read, select Full Details.
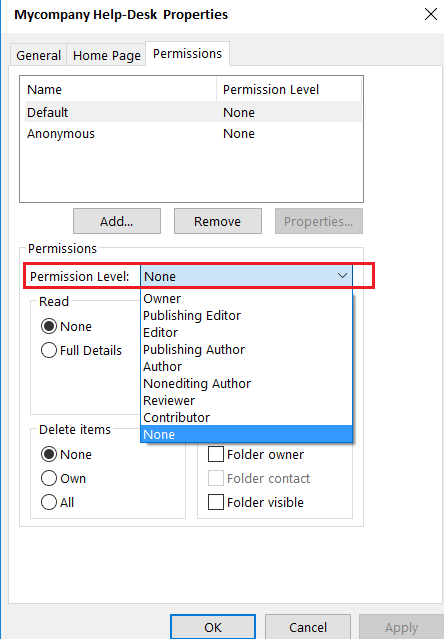
Select the permission level—Editor permissions will provide full access—and click OK.
Troubleshooting shared mailbox synchronization
Shared mailboxes might suffer from a wide range of technical and configuration issues. See below for help on how to proceed if the shared mailbox is not syncing.
1) Disconnect/Reconnect the shared mailbox
This quick action could actually bring the shared mailbox back in sync again. Try to disconnect and connect back the Shared Mailbox to your Outlook profile.
Close Outlook.
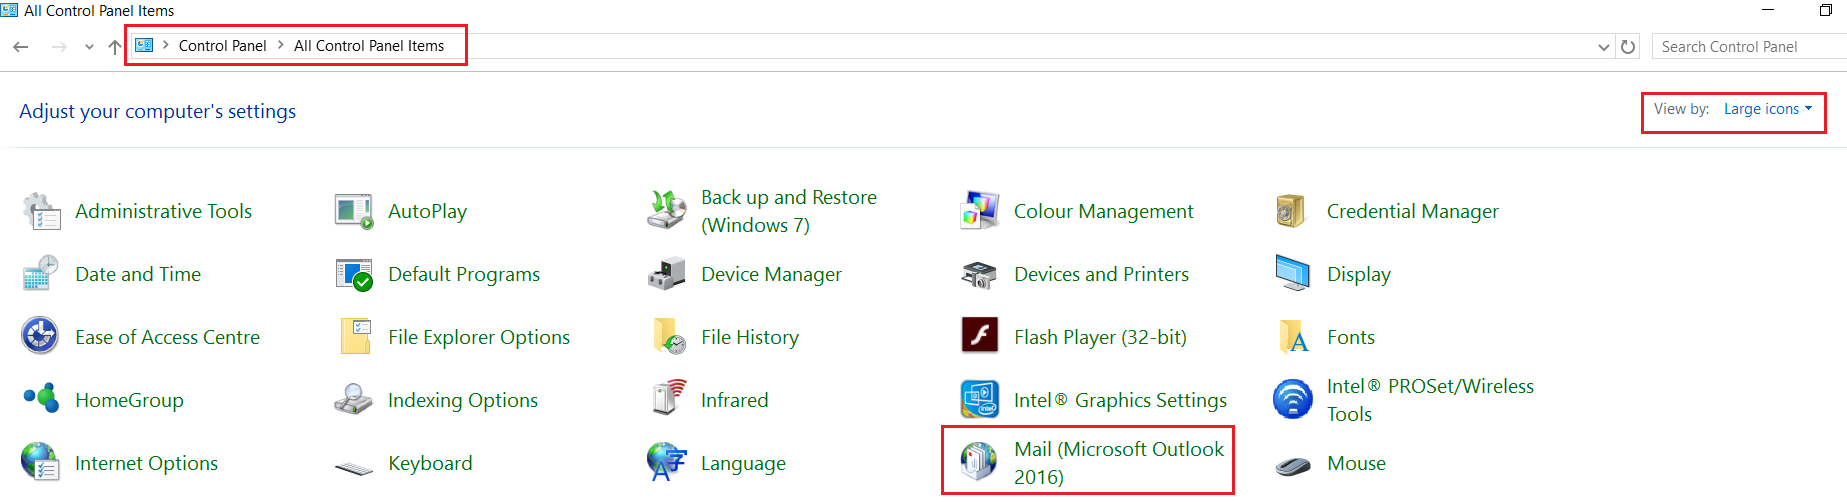
Go to Start > Control Panel (View by Large Icons) > Click on Mail.
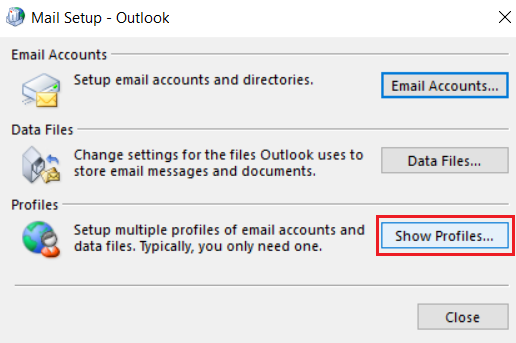
The Mail Setup window will pop up.
Click on Email Accounts.

Select your profile and click on Change.
Select More Settings.
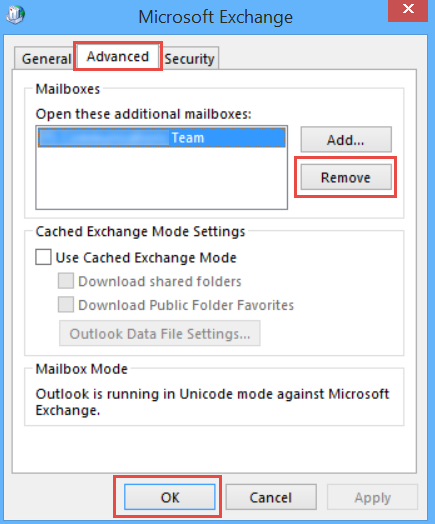
On the Advanced tab, select the Shared Mailbox and click Remove.
Open Outlook again and reconnect the shared mailbox following the process listed for step number 1 (How to add an additional shared mailbox on Outlook). See if the issue persists.
2) Rename the Offline Outlook Data File (.ost)
Office 365 keeps your mailboxes (shared or individual) on a server called Microsoft Exchange. However, Outlook locally caches all folders to which you have access (also for shared mailboxes) in a file called Offline Outlook Data File (.ost).
The Offline Outlook Data File (.ost) is a synchronized local copy of your mailbox saved on your computer, and is stored in the following default location (which might vary depending on the client version and the Outlook account type): C:\Users\<username>\AppData\Local\Microsoft\Outlook
The Offline Outlook Data File, however, can get corrupted or become unreadable from within Outlook. Reasons for this could include a data storage device failure (bad sectors on the hard disk); networking connection failure (if the network connection has a problem, then the synchronization process will be aborted and the OST file is likely to get corrupted); incorrect file system recovery; or viruses.
When this happens either the shared mailbox or your main Inbox might stop syncing.
Very often mailbox synchronization issues with Outlook are due to .ost file corruption and can be resolved simply by renaming the .ost file or by creating a new Outlook profile, which will create a new Offline Outlook Data File (.ost) for Outlook to cache data.
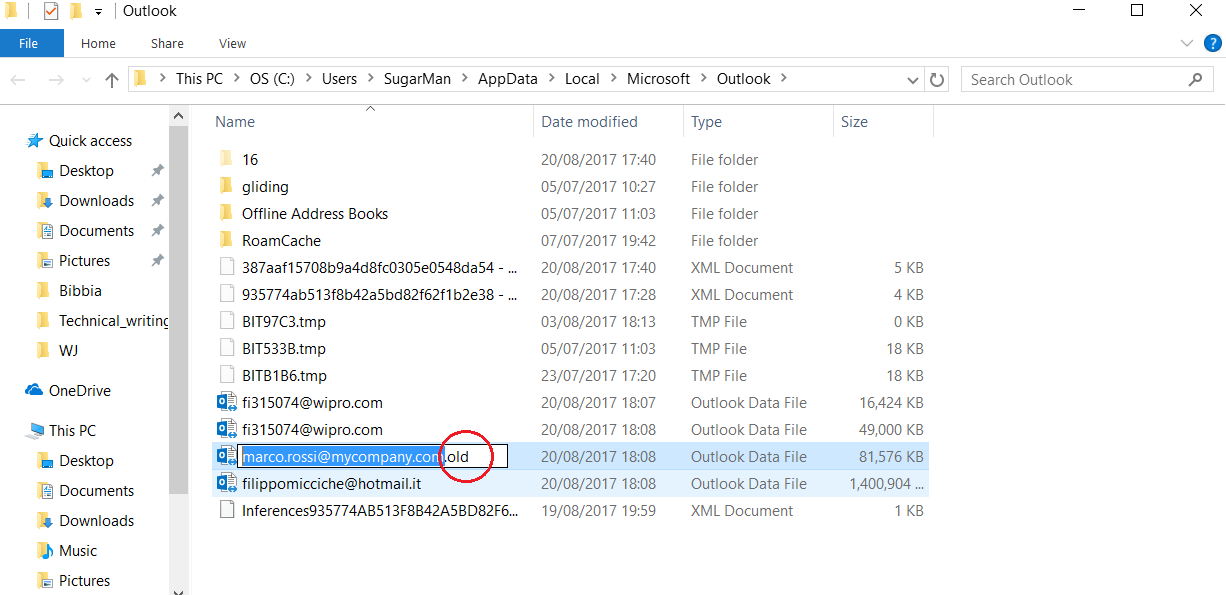
Navigate to: C:\Users\<username>\AppData\Local\Microsoft\Outlook, select the Offline Outlook Data File and rename it (for example, by adding “.old” to the end.)
Restart Outlook and check if the issue persists.
Outlook should create a new Offline Outlook Data File, which will start to synchronize again with the Mailbox on the Exchange Server. Of course, full synchronization might take a while, and some data (emails) might be available on Outlook (especially older items) only a few hours later.
3) Enable/Disable Cached Exchange Mode
The feature Cached Exchange Mode is set up by default when you are using an Exchange account. It works by keeping a copy of your mailbox locally saved (cached) on your computer.
Accessing a local copy allows access to your data to be much quicker, and allows you to work on Outlook while offline.
Using Cached Exchange Mode, you can read and respond to your cached messages while offline, and any new messages or updates to your mailbox on the server will be automatically sent/received once Outlook (specifically the .ost file) gets connected again.
If the shared mailbox is not synchronizing, you might try to disable, restart Outlook, and re-enable again Cached Exchange Mode on the advanced profile configuration settings of your Outlook profile.
Click File > Account Settings > Account Settings.
Highlight the Exchange account, and then click Change.
Go to More Settings.
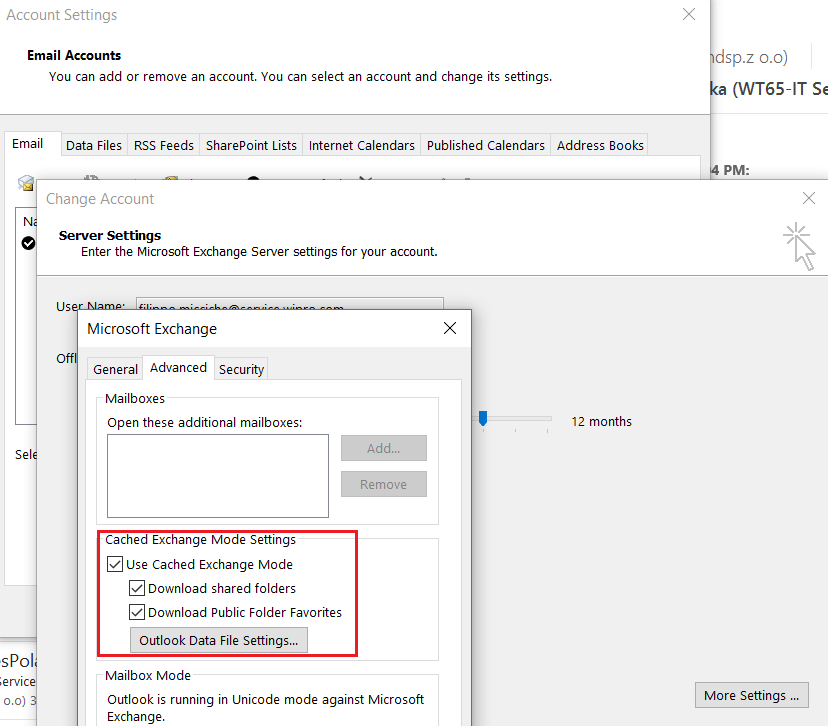
On the Advanced tab, under Cached Exchange Mode Settings, uncheck the option Cached Exchange Mode.
Restart Outlook, re-enable the checkbox and see if the issue persists.
4) Enable “Download shared Folders” and “Public folders favorites”
When Cached Exchange Mode is turned on, shared folders—the folders available in your shared mailbox—are downloaded (in the .ost file) to the local computer.
To make sure that shared folders are properly downloaded to the Offline Outlook Data File when Cached Exchange Mode is turned on, you will proceed as follows:
Click File > Account Settings > Account Settings.
Click the Exchange account, and then click Change > More Settings.
On the Advanced tab, under Cached Exchange Mode Settings, make sure the checkboxes “Download shared Folders” and “Public folders favorites” are selected.
5) Link a shared mailbox to a new Outlook profile
One more check is to see if the shared mailbox is showing the same connectivity problem on a new Outlook profile.
Close Outlook.
Go to Start > Control Panel (View by Large Icons) > Click on Mail.
The Mail Setup window will pop up.
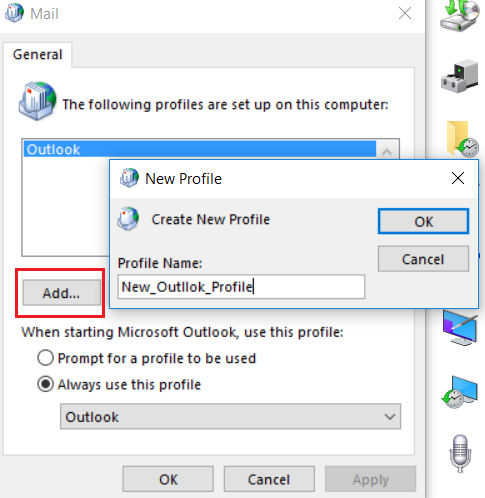
Click on Show Profiles.
Click on the Add Button.
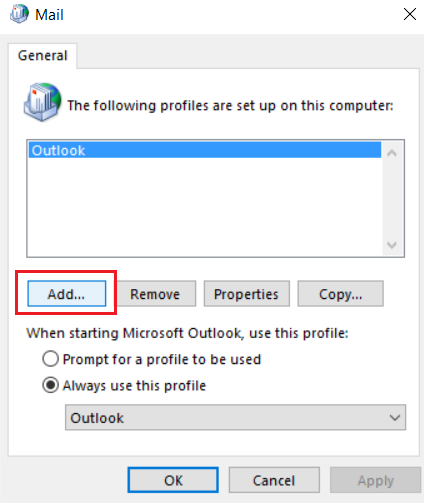
Choose the name for the new profile, and click OK.
The Autodiscover service should be able to create the Outlook profile automatically:
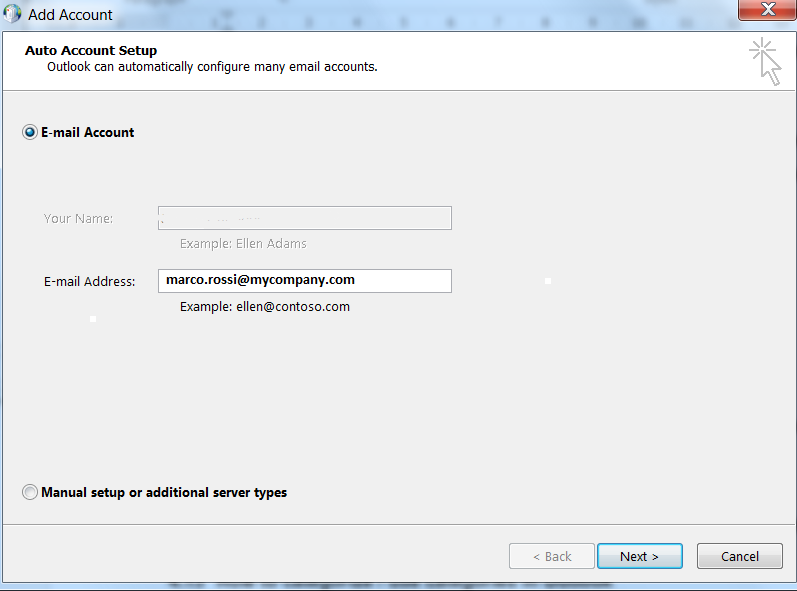
Click on Next.
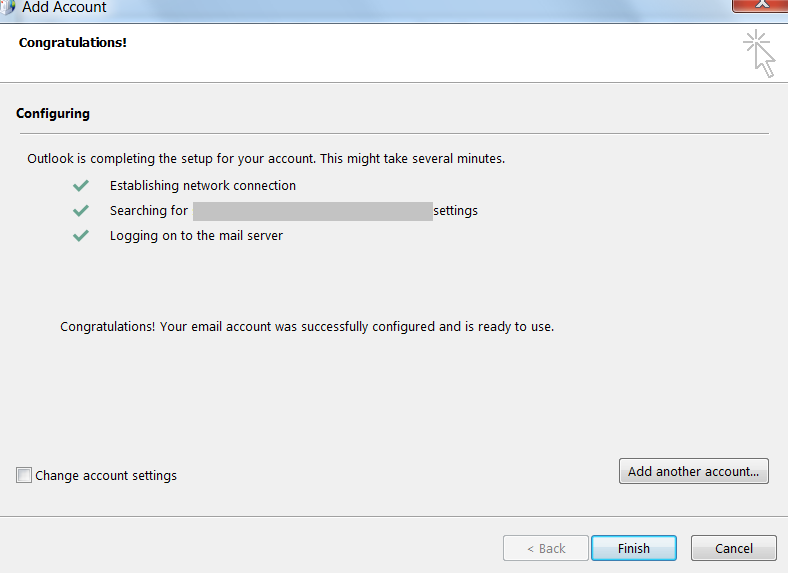
And then click Finish.
Go again to the Mail Configuration window and select the option: ”Always use this profile”.
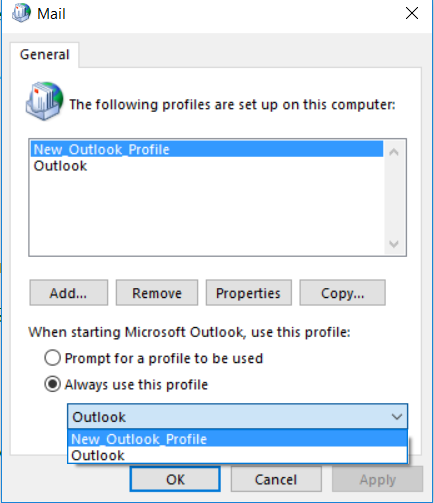
Click OK. Next time Outlook opens up, it will automatically load your new profile.
To add the Shared Mailbox to the new Outlook profile, follow the step above: “How to add an additional shared mailbox in Outlook“.
Check if the Shared Mailbox is synchronizing properly on the new Outlook profile.
6) Check shared mailbox accessibility via the Outlook web app
If the syncing problem still persists with the new Outlook profile, then the problem might be elsewhere. The network infrastructure might have some problem, permissions might not have properly replicated across the infrastructure after the shared mailbox owner granted the target user with permissions and many others.
Check if you are able to access the shared mailbox on the cloud-hosted service Outlook Web App, which is the Microsoft Exchange Web-based email client. The user experience is similar to Microsoft Outlook but it doesn’t need the client software (Outlook) to be installed on the PC. This allows us to access e-mail, calendars, contacts, tasks, and other mailbox content when something is wrong with Outlook.
Just go to https://login.microsoftonline.com, provide your credentials (Outlook email address and password) and log in.
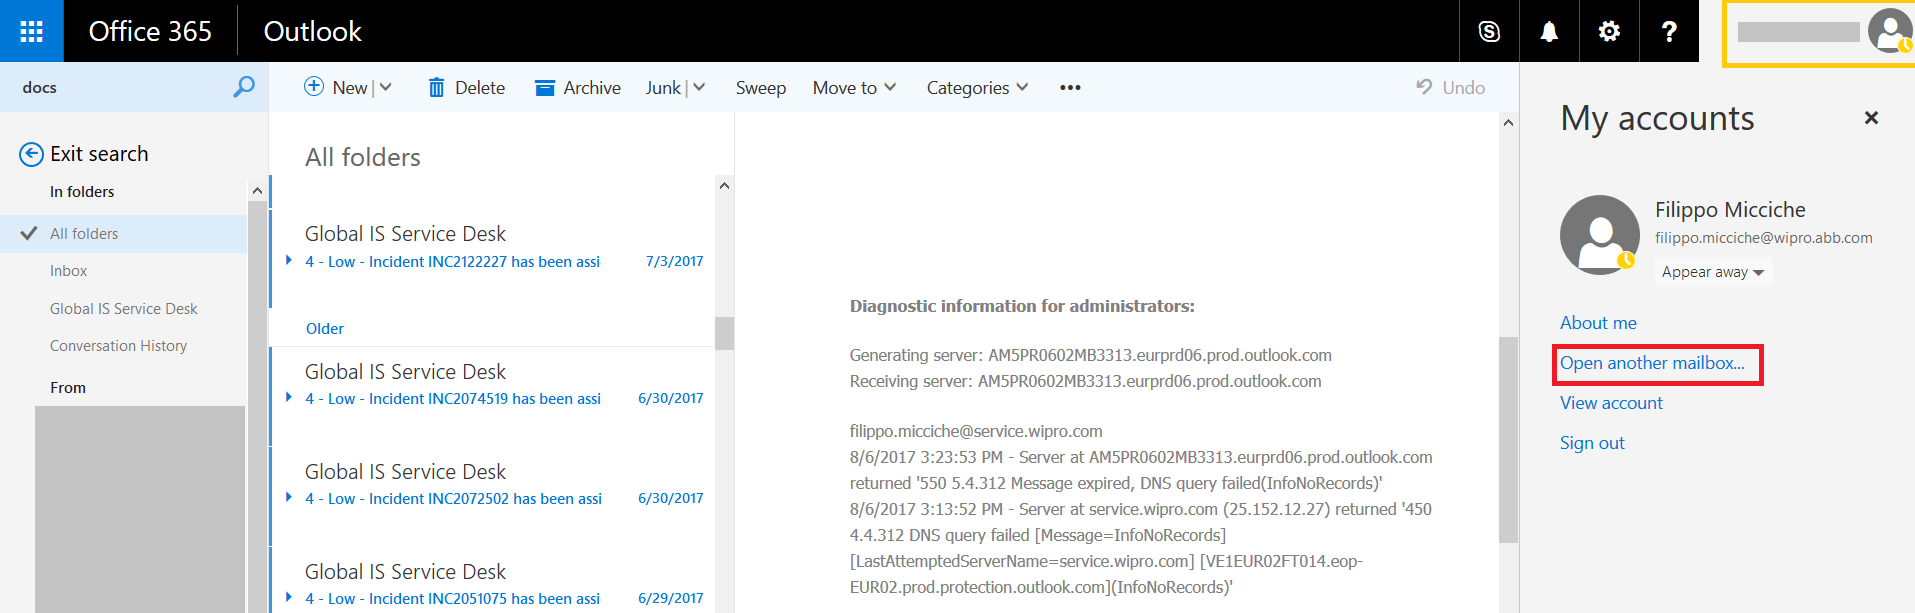
Click on the upper right user icon, and select “Open another Mailbox”.
Insert the shared mailbox email address.
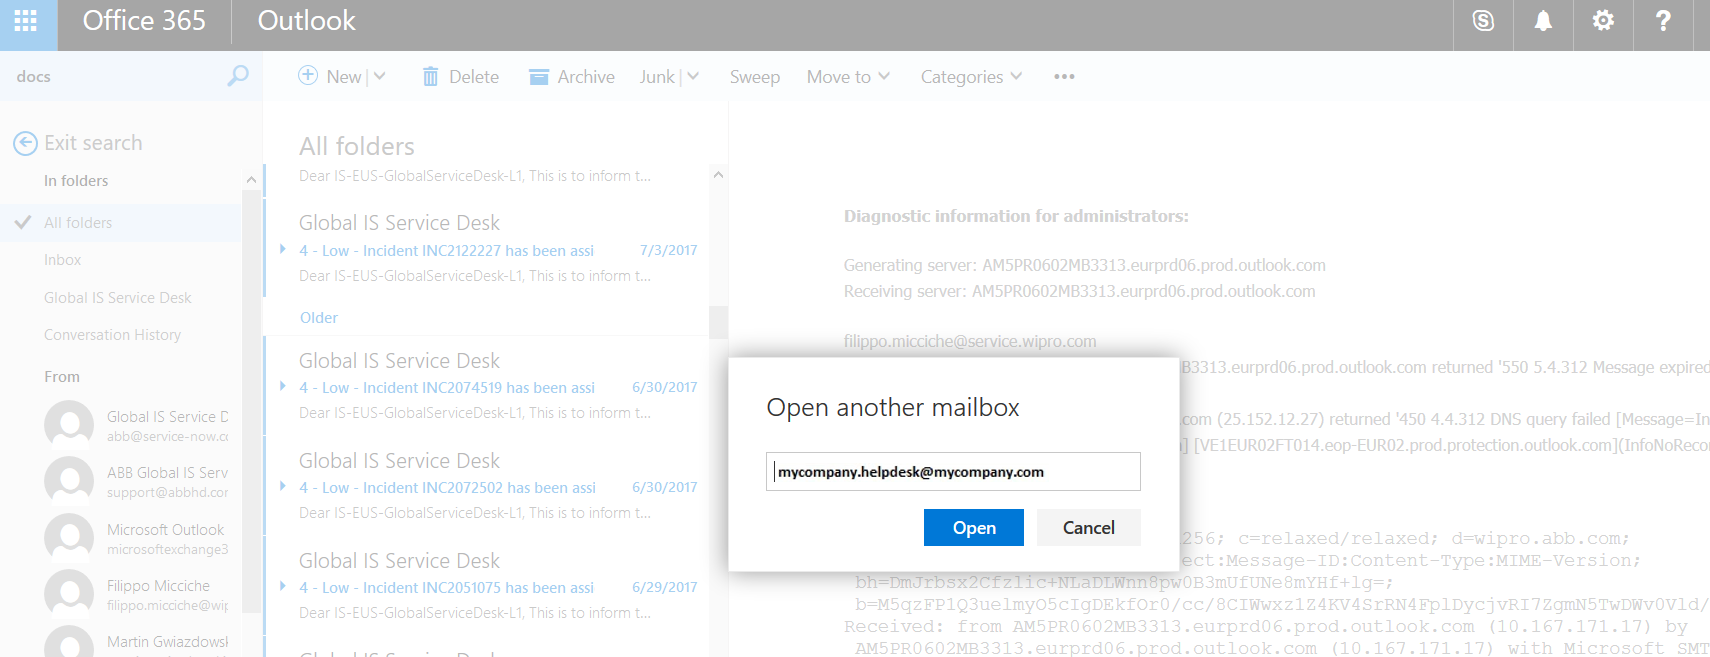
Click on Open.
If the Mailbox is available and properly synchronizing via Outlook Web App, this means that the issue is local, with Microsoft Outlook, and you will need to investigate further.
If the shared mailbox is neither accessible nor properly synchronizing on the web app, the problem most likely needs to be fixed at the server level. In this case, you should contact your system administrator.
Looking for more support?
Join our partner network for expert technical support, strategic business planning and access to products, solutions and resources that can help your business grow.