We all know what a great email application Microsoft Outlook is. But have you ever explored its scheduling and calendar functions?
Learn how to transform your MSP and your clients’ businesses with Microsoft 365
In Outlook’s Home tab, select the arrow beside the New Email menu (if you select New Email, you will get the new email dialog). Select a new Appointment or Meeting from the drop-down list.

Appointments and meetings are very similar, so we will use an appointment as an example.
1. Select Appointment from the menu.
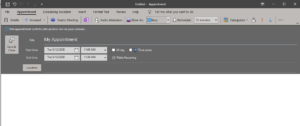
2. You can enter a lot of detail here, such as a title, time and date, location, whether it is an all-day appointment, and whether you want the appointment to recur in the future.
And that’s just for starters! Take a look at the Appointment ribbon:
![]()
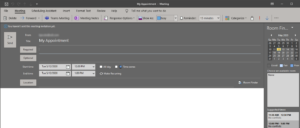
3. Here you can invite other individuals to join by email, set reminders to yourself, mark your calendar as busy during the appointment, and categorize the appointment as you wish.
Here is an example of inviting others to join. Outlook checked your availability and also inserted the appointment details into the email. When you invite others, you can designate them as required attendees, or they can attend if they wish (optional).
4. Once you have filled out the necessary information for the appointment, select Send.
Your Calendar page
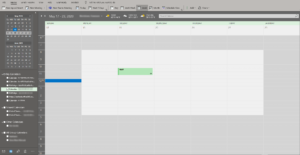
So now that we have an appointment scheduled, let’s talk more about the Calendar feature. Select the Calendar icon on the bottom left of Outlook:
![]()
Here is a typical calendar page. It looks a bit complex, but we will go into further detail.
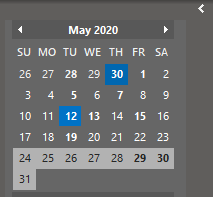
Let’s start from the left pane.
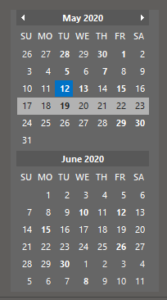
Outlook provides an interactive display of the current month and the next month. You can select the next and previous arrows to change the month. If you choose a specific day, the calendar view in the main window opens up to that date.
This is a quick and easy way to check appointments or meetings for a specific day.
Further down on the left pane are all the available calendars that you may view.
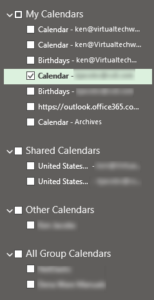
You can view your calendars, those shared with others in your organization, calendars from outside the organization, and calendars created for groups you are in. When you select the checkbox for calendars, they display side-by-side for ease of viewing.
If you do not wish to see the left pane, select the right arrow to hide it or the left arrow to show it.
You can also pin the left pane to display all the time if you choose.
Calendar ribbon
Next, let’s look at the Calendar ribbon:
![]()
The ribbon allows you to:
- Create new appointments, meetings, or Microsoft Teams meetings
- You can view your calendar in many ways:
- Today – highlights today no matter what other views may be displaying
- Next 7 days – shows the next seven days
- Day – shows today by the hour
- Work Week – shows the days of the current workweek (no weekends)
- Week – shows the days of the current seven-day week
- Month – shows the days in a monthly view
- Select the Schedule View to see your appointments day-by-day. Schedule View is an alternate method of viewing calendars that lets you easily see when events overlap and where there is free time between those calendars. Schedule view is especially helpful when planning meetings between multiple people.
- Create a blank calendar or share calendars from other sources like your list of contacts or the internet using the Add
- Share your calendars with others using the Share
Below the Calendar ribbon is another row of options.
![]()
You can select the left or right arrows to have the previous or next month displayed in the main window.
You can change the location by selecting the down arrow. In addition to changing the location and time zone, the weather displays for that location. That is helpful if your appointment or meeting is outdoors!
Adding events
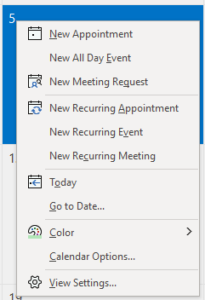
So we have seen the many different ways you can view your calendar events. Outlook also makes it easy to create events “on the fly.”
Right-click on a day and the following drop-down list displays to let you enter a new event.
Searching
Beside this section is the Calendar Search text box.
![]()
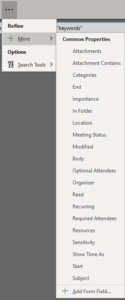
A calendar search looks in the following fields in the Events Details form:
- Subject
- Location
- Body (where you type notes)
- Attachments
- Organizer (who sent the invitation to a meeting)
- Attendees (people invited to a meeting)
To search, enter your desired text. The results display:
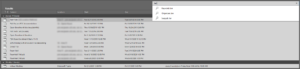
As you can see, you can filter search text even further by selecting Keyword, Organizer, or Subject filters.
In addition to showing the results, Calendar also displays a Search Tools ribbon.
![]()
The first drop-down list lets you choose which folders to review, such as the All Calendar Items, Current Folder, Subfolder, or All Outlook Items.

Other ways to filter include:
- By Organizer
- By Subject
- Has Attachments
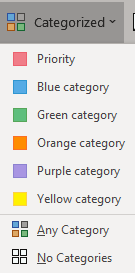
- By Category
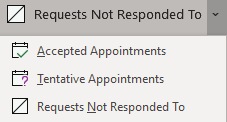
Status of Requests, for example, Accepted Appointments, Tentative Appointments, or Requests Not Responded To.
You can view recent searches by selecting the Recent Searches drop-down list. You can further refine your searches using other parameters.
So as you can see, the Calendar feature has a lot going for it. Check it out next time you are in Outlook. And contact us today if you need help with your Microsoft environment.