Many people are interested in establishing a reliable connection between Outlook and Microsoft Dynamics 365. They want to select a button in Outlook, fill out a form, and have the information mapped back into Dynamics 365.
However, most users do not know how to achieve this, and they end up resorting to using third party software integrations with Dynamics 365.
After listening to the concerns and needs of their customers, Microsoft designed an application that can be installed either as an add-in on Microsoft Outlook or as a desktop client. This makes Dynamics 365 easily accessible from virtually any device (Mobile phones, Tablets, Mac or Windows PC) and even Outlook on the web.
Benefits of integrating Dynamics 365 with Outlook
- A smarter way to work and easier way for users to update CRM with increased efficiency across your organization.
- Offline access to Dynamics 365 data for people who may not have access to internet connectivity and need to access data anytime and anywhere. Information can be stored locally on the device until it can be synchronized back to Dynamics 365.
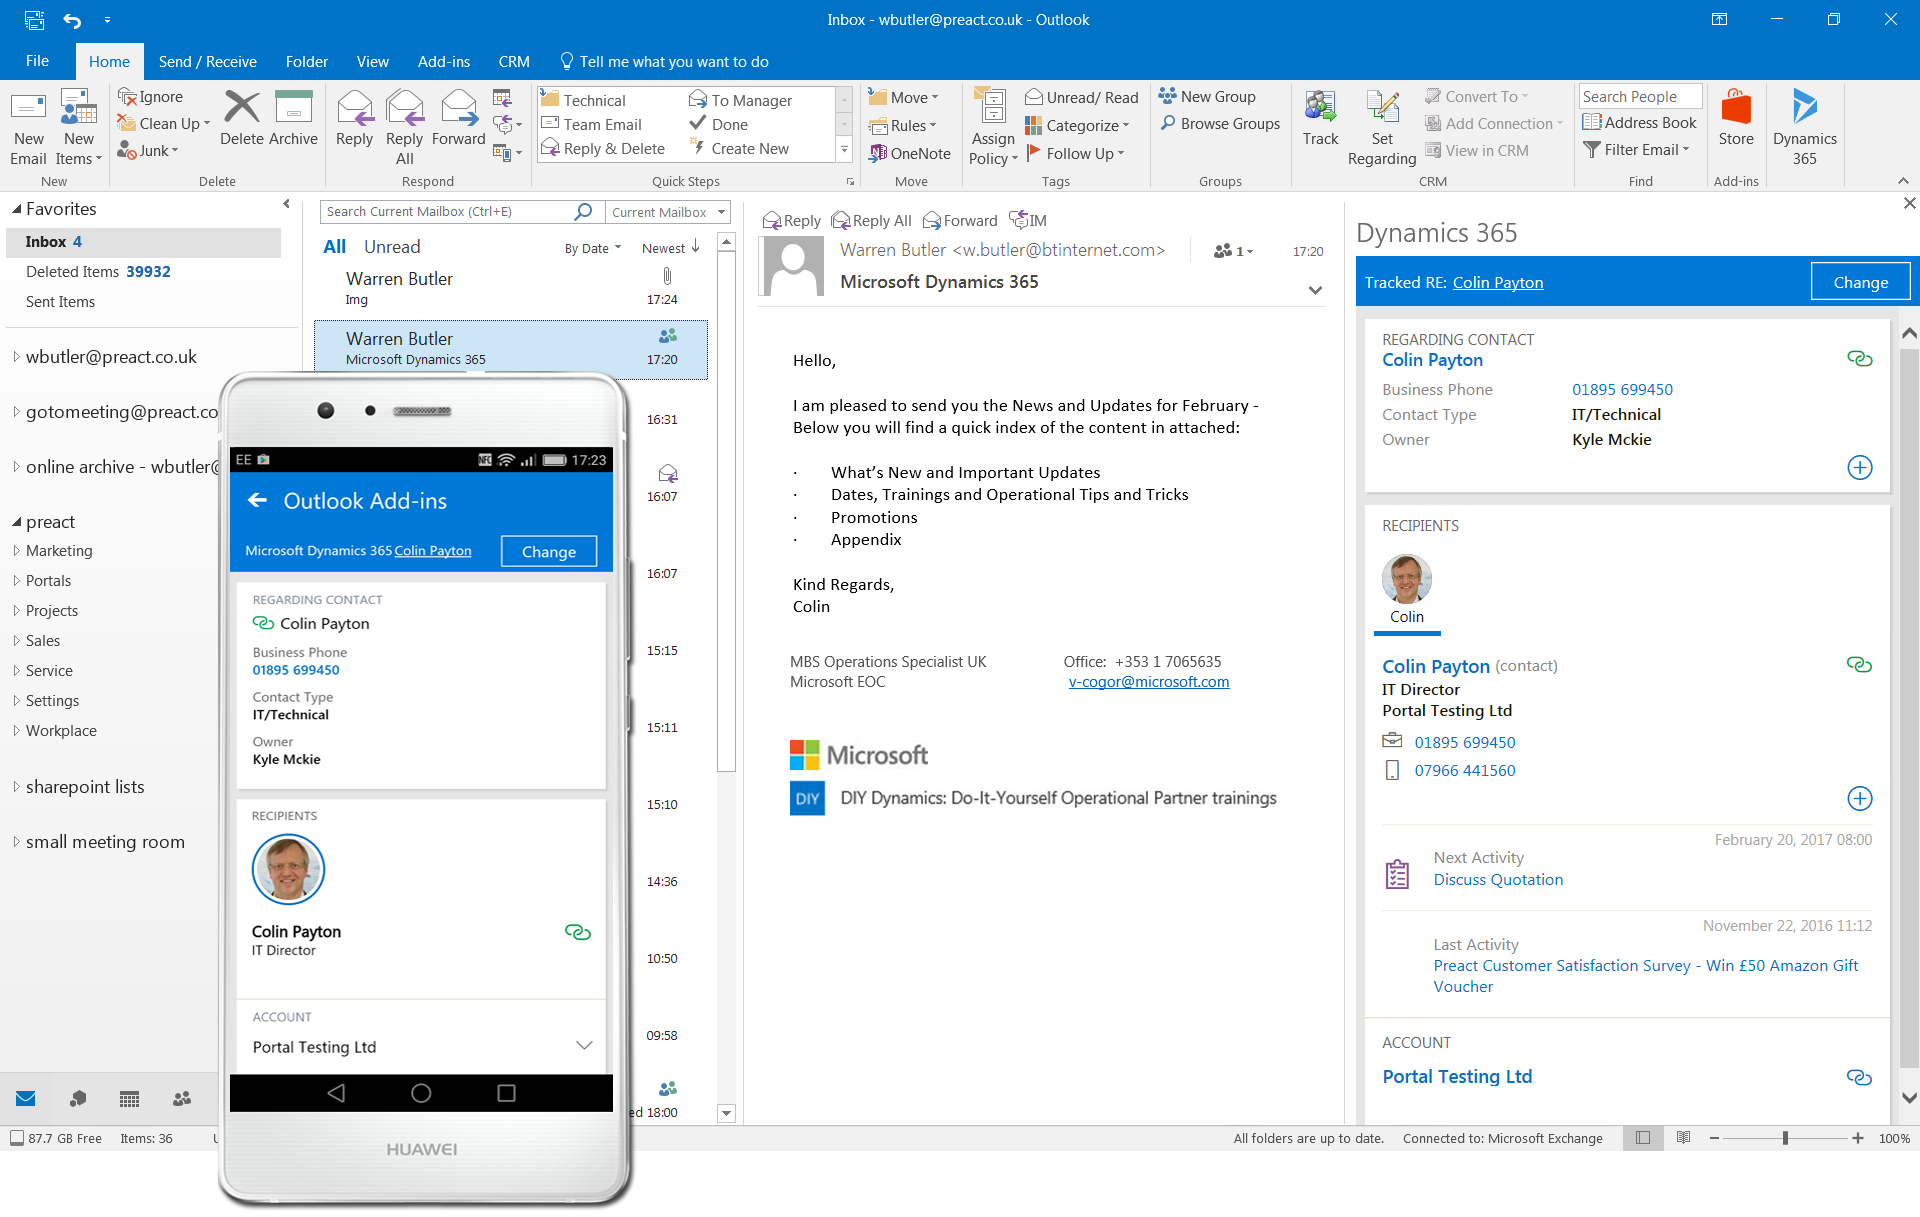
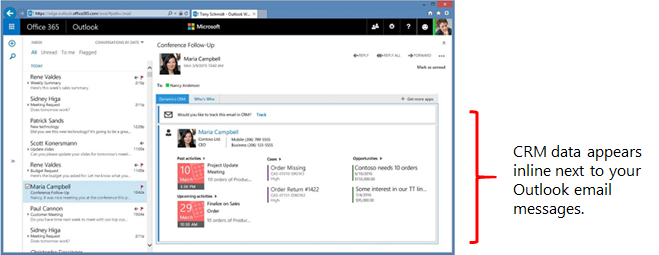
- Ability to view information about Dynamics 365 contacts and leads while you’re working in Outlook. You can view this info in the context of an email message, meeting, or appointment.
- Create a new Dynamics 365 record for any entity (record type), as long as the entity has been enabled for mobile and for multi-entity search.
- Easily track emails using Outlook across virtually any device. You can use the Outlook Web App to easily track sent and received emails in CRM using a web browser or mobile app.
There are 2 ways of integrating Dynamics 365 with Outlook:
- You can choose to install the Dynamics 365 app for Outlook and get web access to track emails across almost all devices.
- Opt for the full Dynamics 365 for Outlook Desktop Client with offline capabilities.
1. Dynamics 365 App for Outlook
Dynamics 365 App for Outlook is a lightweight app that can be used to track emails and create new records. For best performance, enable only the minimum required record types (entities). It is available as a Microsoft Office add-in.
As of the December 2016 update for Dynamics 365 (online and on-premises), Dynamics 365 App for Outlook paired with server-side synchronization is the preferred way to use Outlook together with Dynamics 365.
If you want to have access to offline capabilities of Dynamics 365, then you will need to install Dynamics 365 for Outlook Desktop Client.
How to install the Dynamics 365 app
Step 1
Ensure you have the security privilege to use Dynamics 365 App for Outlook.
Step 2
Check that your organization synchronizes mailboxes with server-side synchronization.
Step 3
Click the Settings button in the top right-hand corner of your Dynamics 365 application and then click Apps for Dynamics 365.
Step 4
On the Apps for Dynamics 365 page, under Dynamics 365 App for Outlook; click Dynamics 365 App for Outlook.
Step 5
Install the app.
2. Dynamics 365 for Outlook Desktop Client
Dynamics 365 for Outlook is a free download that integrates Microsoft Dynamics 365 (online) into the Outlook interface so that a user can work efficiently with both email and Microsoft Dynamics 365 (online) data. This provides complete Dynamics 365 capabilities (including offline capabilities) from Outlook.
How to install Dynamics 365 for outlook?
Step 1
Ensure that the computer meets the necessary Outlook hardware requirements.
Step 2
Login as a local Administrator.
Step 3
Click to run the Setup file.
Step 4
Accept the License agreement and choose whether you want to download the Recommended updates then click Next.
Step 5
Click Install Now.
Step 6
After Dynamics 365 for Outlook is installed, it must be configured. When you restart Outlook after you’ve installed Dynamics 365 for Outlook, the configuration wizard starts automatically.
Note:
- You can’t install Dynamics 365 for Outlook on a computer running Microsoft Exchange Server.
- Tracking activities are not supported when Dynamics 365 App for Outlook and Dynamics 365 for Outlook are used together by the same user. Choose one or the other.
- To deploy to Dynamics 365 on-premise users, you will need to configure internet facing deployment (IFD).
Welcome to the Dynamics 365 partner-to-partner network
We match MSPs who want to resell Dynamics 365 with our Dynamics technical experts. Both sides benefit from each other\'s skills to create new business opportunities
Join our P2P networkWorking offline with Dynamics 365 for Outlook
As mentioned earlier, one major benefit of using Dynamics 365 for Outlook is the ability to work offline when you are on the move and not connected to the internet.
To install Dynamics 365 for Outlook with offline capability:
- First option: during the installation, click Options, select Offline Capability on the Customize Installation page, and then click Install Now.
- Second Option: Skip and ignore Offline Capability during the installation (an Outlook user can add offline capability later by clicking Go Offline in Outlook).
So how is the offline capability achieved?
Dynamics 365 for Outlook saves a subset of Dynamics 365 data in a folder on your computer hard drive where it is installed. It works in such a way that when you go offline, it saves all changes in the folder and synchronizes automatically with Dynamics 365 server when you are back online.
Although offline capabilities allow you to work without internet connectivity, it uses lots of computer resources. Thus, ensure the computer meets the minimum requirements before installing to avoid performance issues.
An administrator determines whether or not users in the organization are permitted to go offline with Microsoft Dynamics 365 for Outlook by using security roles.
Also, users and administrators can configure which entities can be downloaded via Offline Sync by using the Sync Filters setting in the Options dialog box.
Alternatively, users and Administrators can configure which fields can be downloaded (and uploaded) by using Advanced Options in the Sync Filters dialog box.
